
Email Signatures
Thanks for taking the time to format your email signature to match the overall brand of Holy Cross Medical Center. All employees at Holy Cross Medical Center (and the TPS clinics) with a @taoshospital.org email address are required to use the following settings.
Below you will find step-by-step instructions that will make the process as straightforward as possible.
Step 1:
Download the logo that represents the location you work, you’ll need this in one of the steps so save it somewhere on your computer that is easy to find. To download, simply right-click on the image you want to download and select ‘Save Image As’.
If you are a manager that oversees employees and services in more than one location, please use the Holy Cross Medical Center Logo. If you work for a department of Holy Cross Hospital, please use the Holy Cross Hospital logo. If you work for a specific clinic, please use the appropriate logo. If you are unsure, email marketing@taoshospital.org and we will help you in choosing the correct logo.







Step 2:
Click on the ‘settings’ icon in the top right corner of Outlook.

Step 3:
Click on ‘Account’ in the upper left.
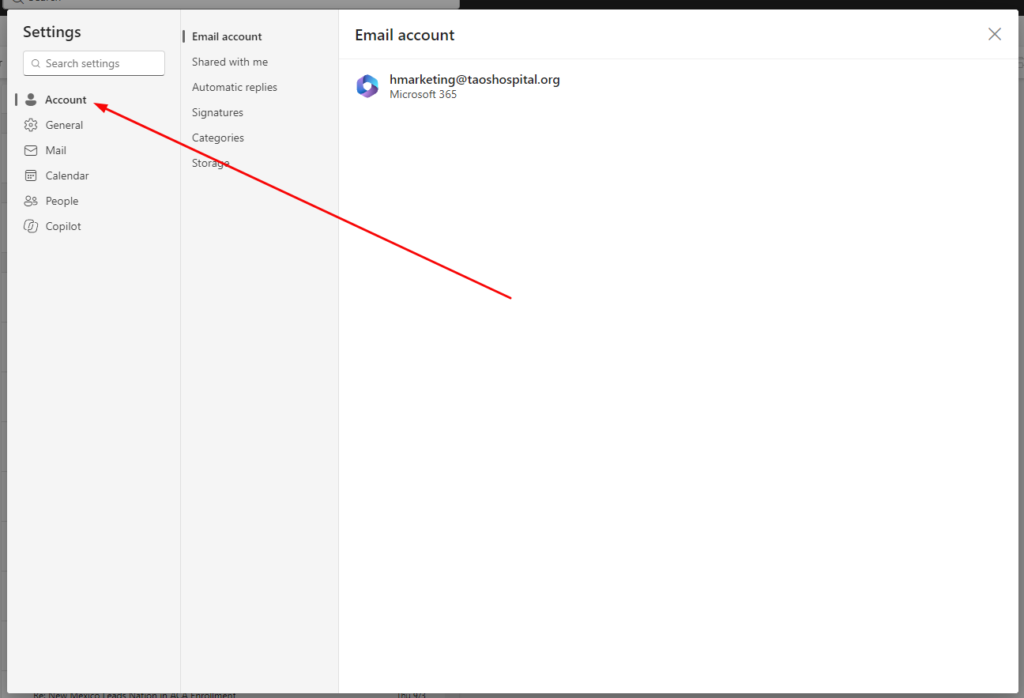
Step 4:
Click on “Signatures”
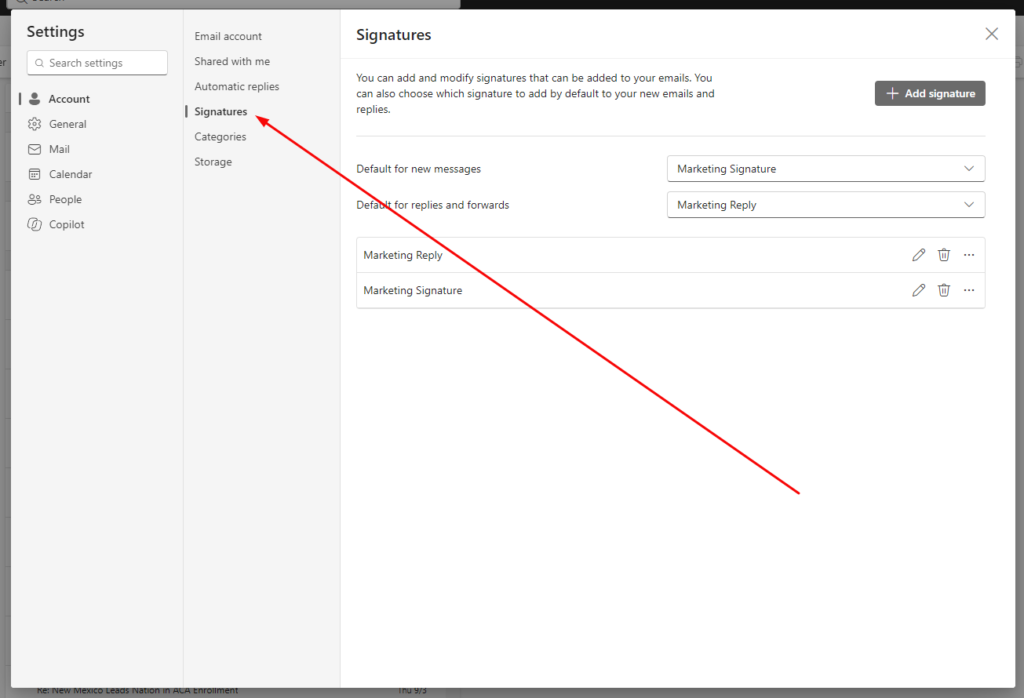
Step 5:
Click on ‘Add signature’
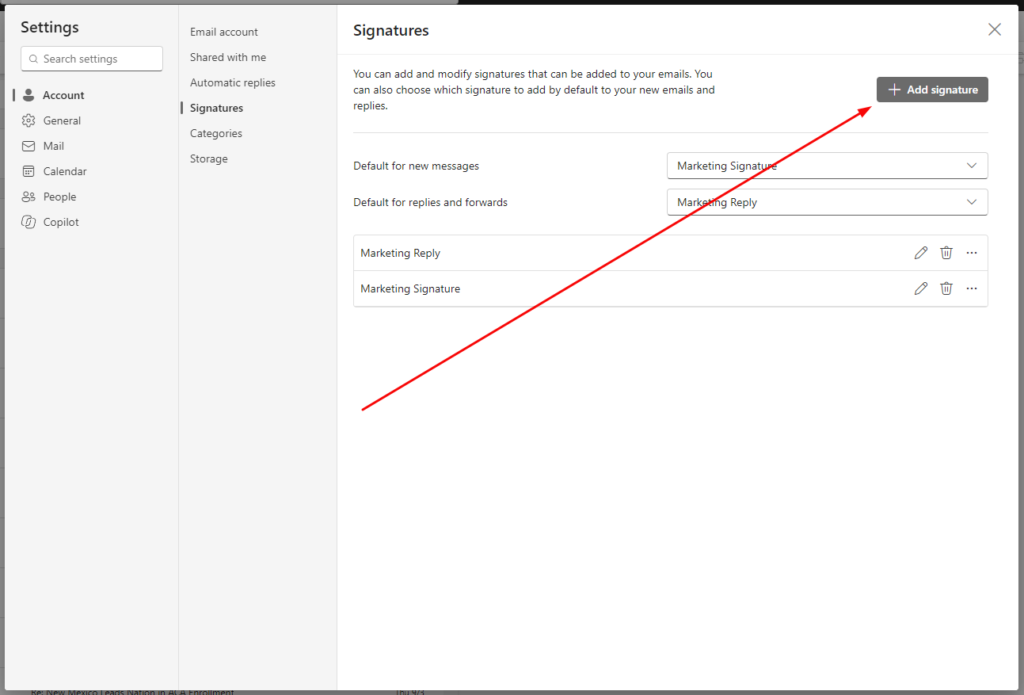
Step 6:
Add a name for your signature.

Step 7:
Fill out your signature using the following example as a template. You can also copy and paste the following text to get started. Make sure when you paste it, you right click and select ‘paste as plain text’.
First Last, Credentials and/or Title (if necessary) | Location Name, Department (if necessary) | Email@TaosHospital.org | 1.575.555.5555
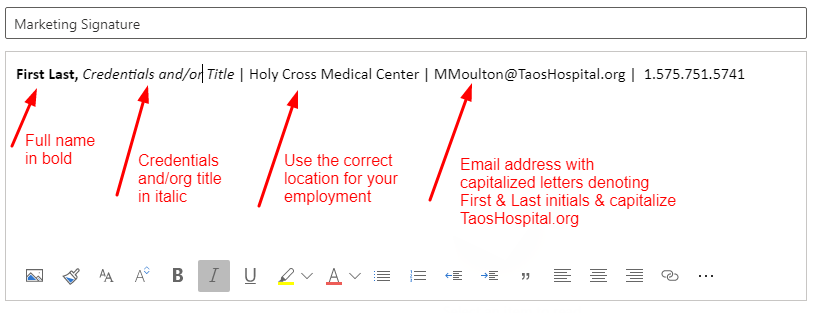
You don’t have to include credentials or title if you don’t think it’s necessary, but if you do, please italicize them.
If you work for a department, please include the department name in italics after the name of your location. For example: Holy Cross Hospital, Physical Therapy & Rehabilitation
If you have multiple phone numbers please include them like the following example:
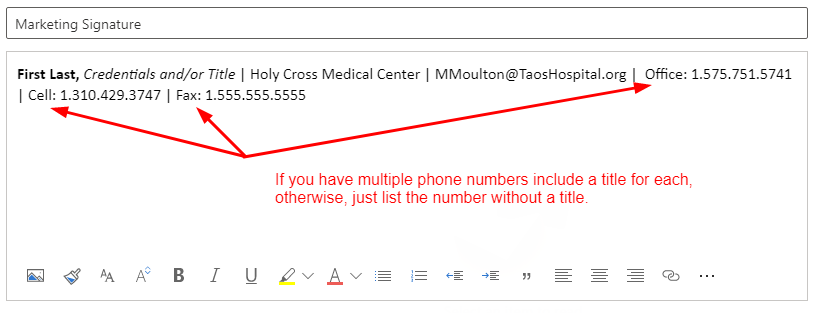
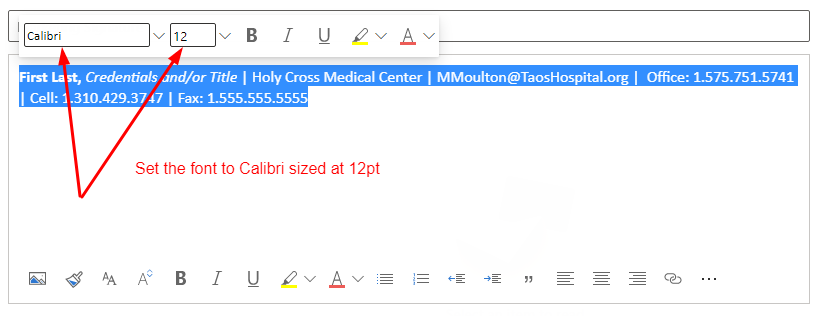
After you have created the content for your signature, select the entire signature, and change the font to ‘Calibri’. We know that many of you will want to choose a ‘fun’ font, but in order to keep everything uniform with the brand, we want everyone to use ‘Calibri’ as the font for their signature and the body text of their email.
Step 8:
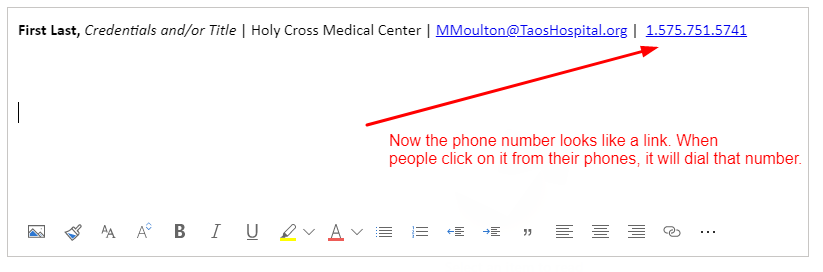
With so many people using their phones for email these days, it’s worth taking the time to make your email address and primary phone number clickable on phones. This allows people to click on your email address and open it to compose a new message or add you to their contact list, and when you use it on a phone number it allows them to click the number and it will automatically dial the number.
Start with your email address
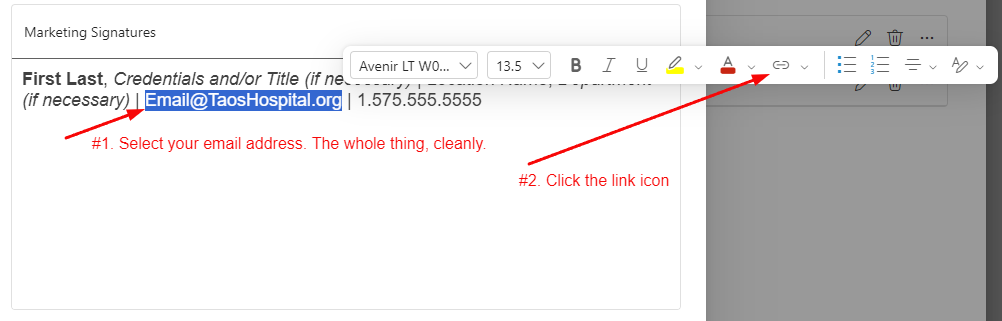
8.a: Select your email address and click the little ‘link’ icon in the lower right of the text editor.
8.b:
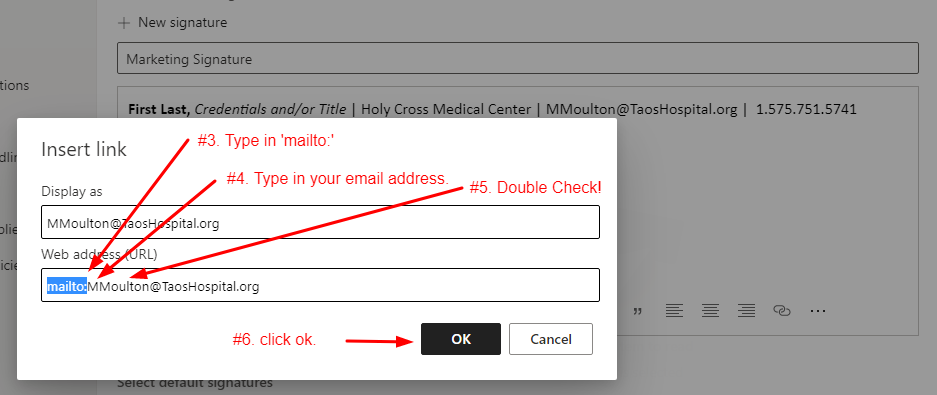
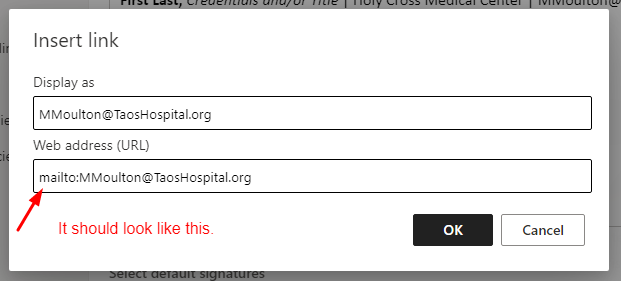
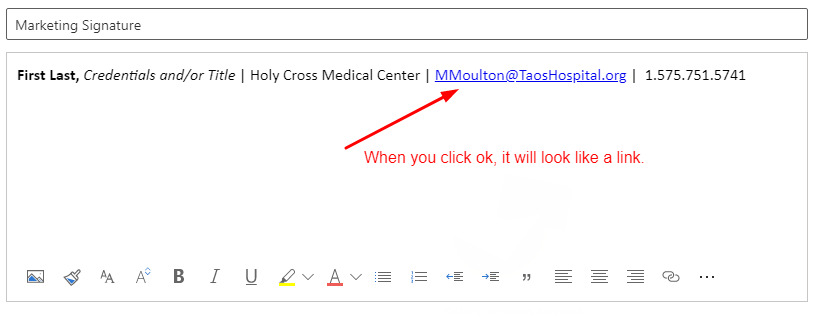
In the ‘Web address (URL) text box enter “mailto:” followed by your email address, It will look like the following:
mailto:YourEmailAddress@TaosHospital.org
Now let’s set up your phone number as a link
8.c: Select your phone number and click the little ‘link’ icon in the lower right of the text editor.
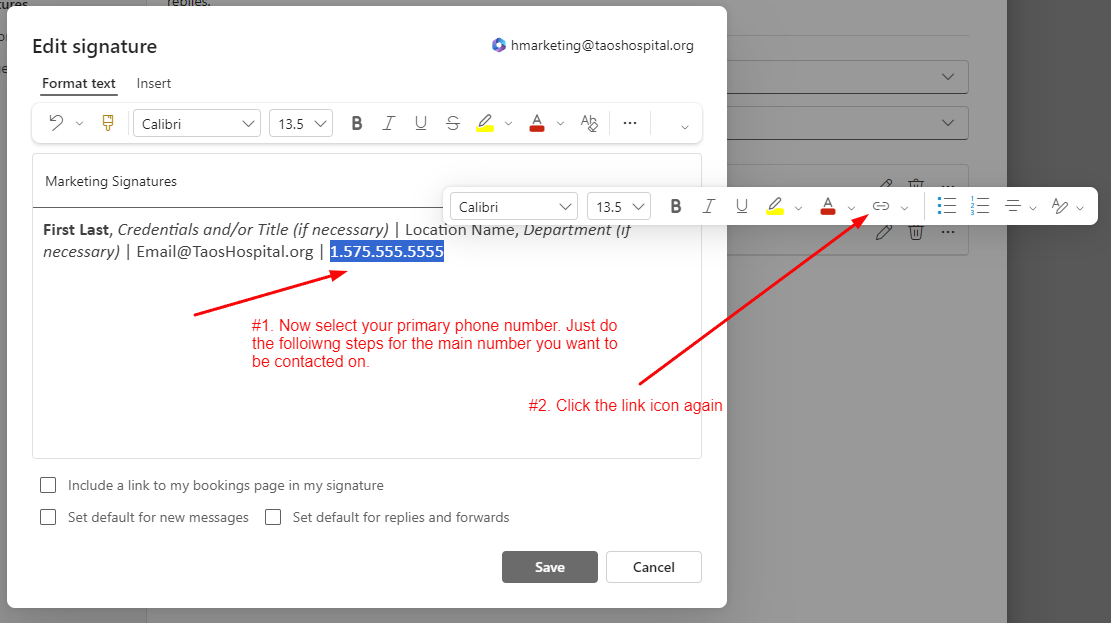
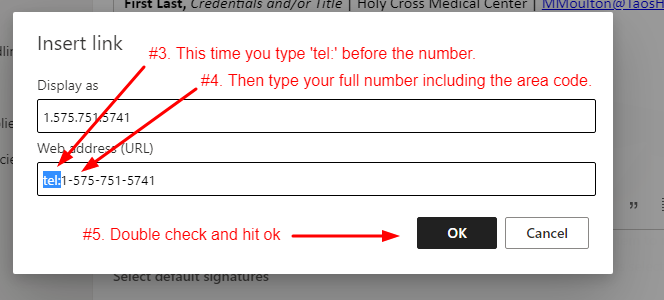
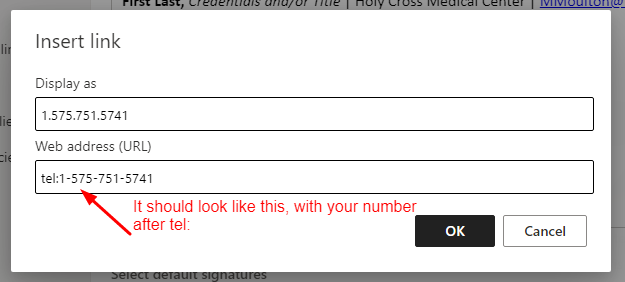
7.d: In the ‘Web address (URL) text box enter “tel:” followed by your full telephone number, It will look like the following:
Step 9:
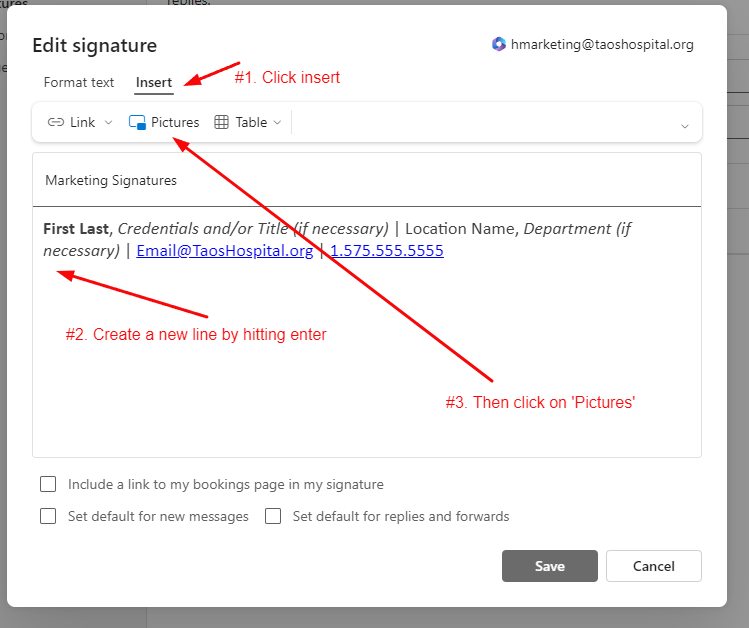
Remember the logo you downloaded in Step #1? This is where we use it. Start by clicking on ‘Insert’ near the top of the box, then create a new line under the signature text by hitting enter, then click on ‘Pictures’ above the text editor.
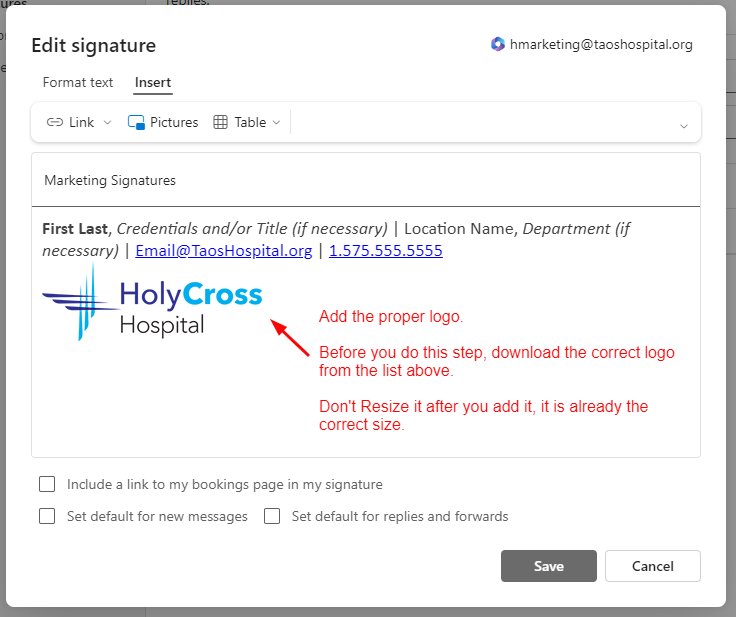
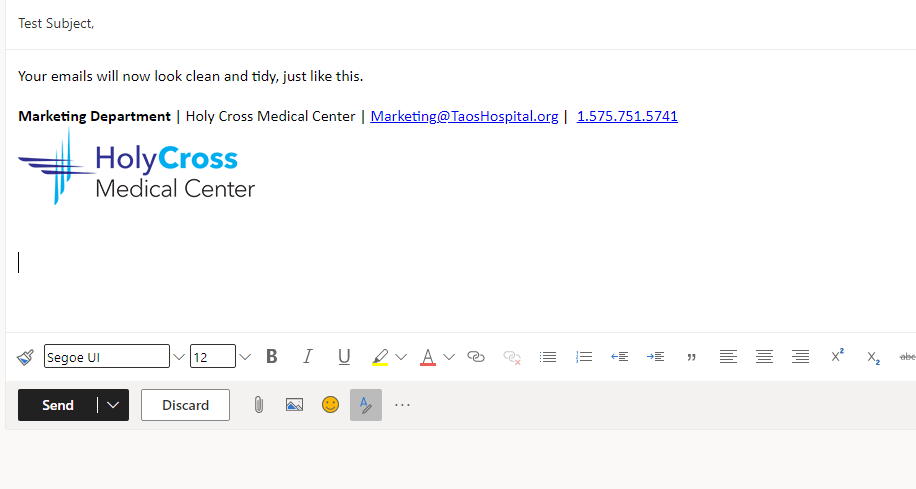
In the window that pops open, navigate to the image you downloaded in Step #1, select it and open it. If you followed the steps right and remembered to start a new line under the signature it should look like the following example. Note: Do note adjust the size of the logo, it is already the correct size.
Double check that everything looks correct and click ‘Set default for new messages’.
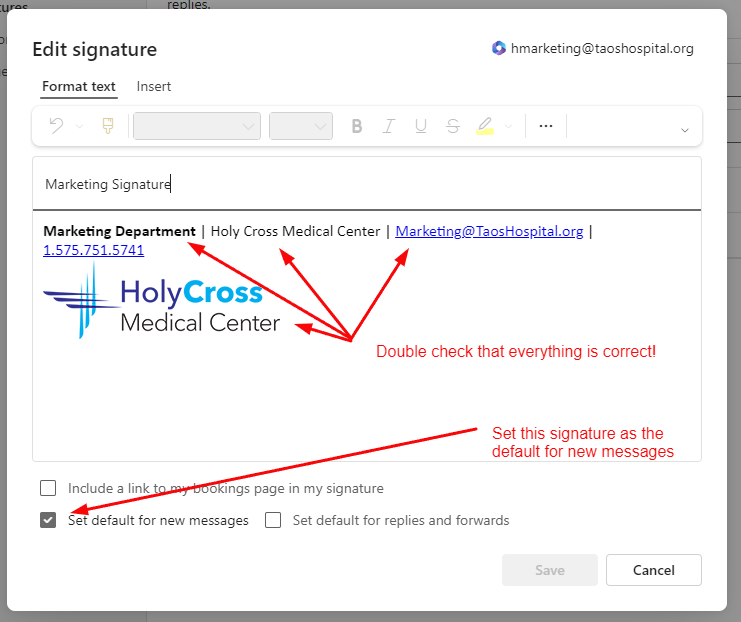
Now save your changes by clicking on the ‘save button’.
Step 10:
We’re not done yet! There is one final option that Outlook offers, and that is for a secondary signature that shows up in replies. We don’t need the logo to show up anymore, but we do want your signature to be seen so that everyone knows who sent the email.
Start by selecting just the line of text that makes up your signature and copying it. You can either use (shift + c) or you can right-click and copy.
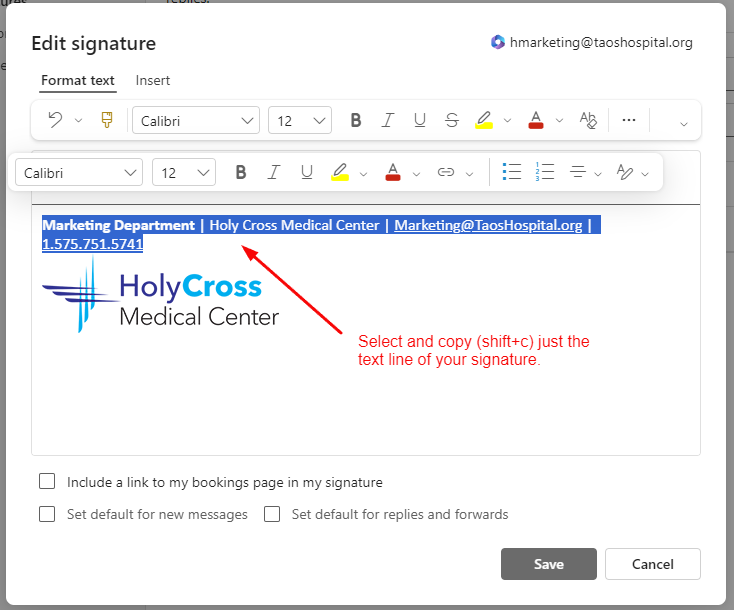
Either save or close this box, and then click ‘Add Signature’ from the main Signatures page.
Now now add a similar name but add ‘Reply’ at the end. Paste the content that you copied into the text editor. You can either use (shift+v) or right-click and ‘paste’. Also click ‘Set default for replies and forwards’.
Don’t forget to save.
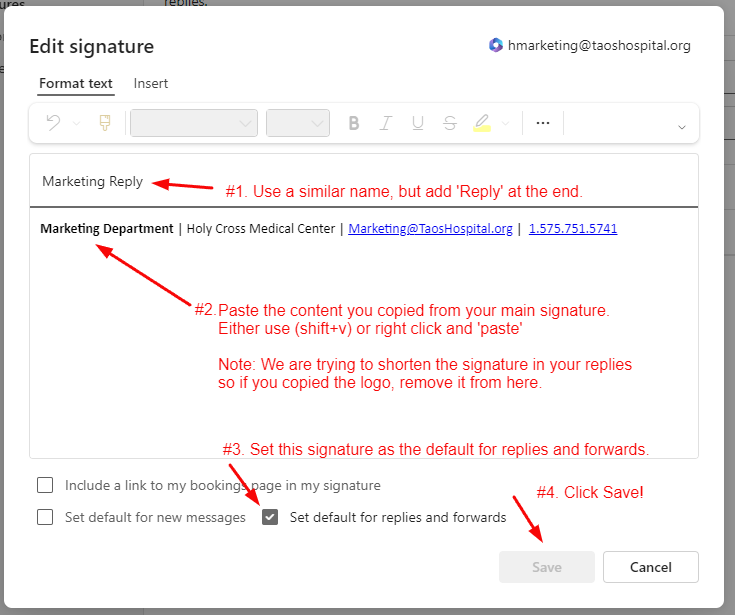
On the main Signatures page, verify that the two signatures are set correctly for the default options.
Step 11:
Confirm that the signatures you created show up in the default box for both signatures.

Step 12:
One final setting before you are done. In settings, click on ‘Mail’, then click on ‘Compose’. Under message format, choose ‘Calibri’ as the font. This is the default font for everyone’s email at Holy Cross.
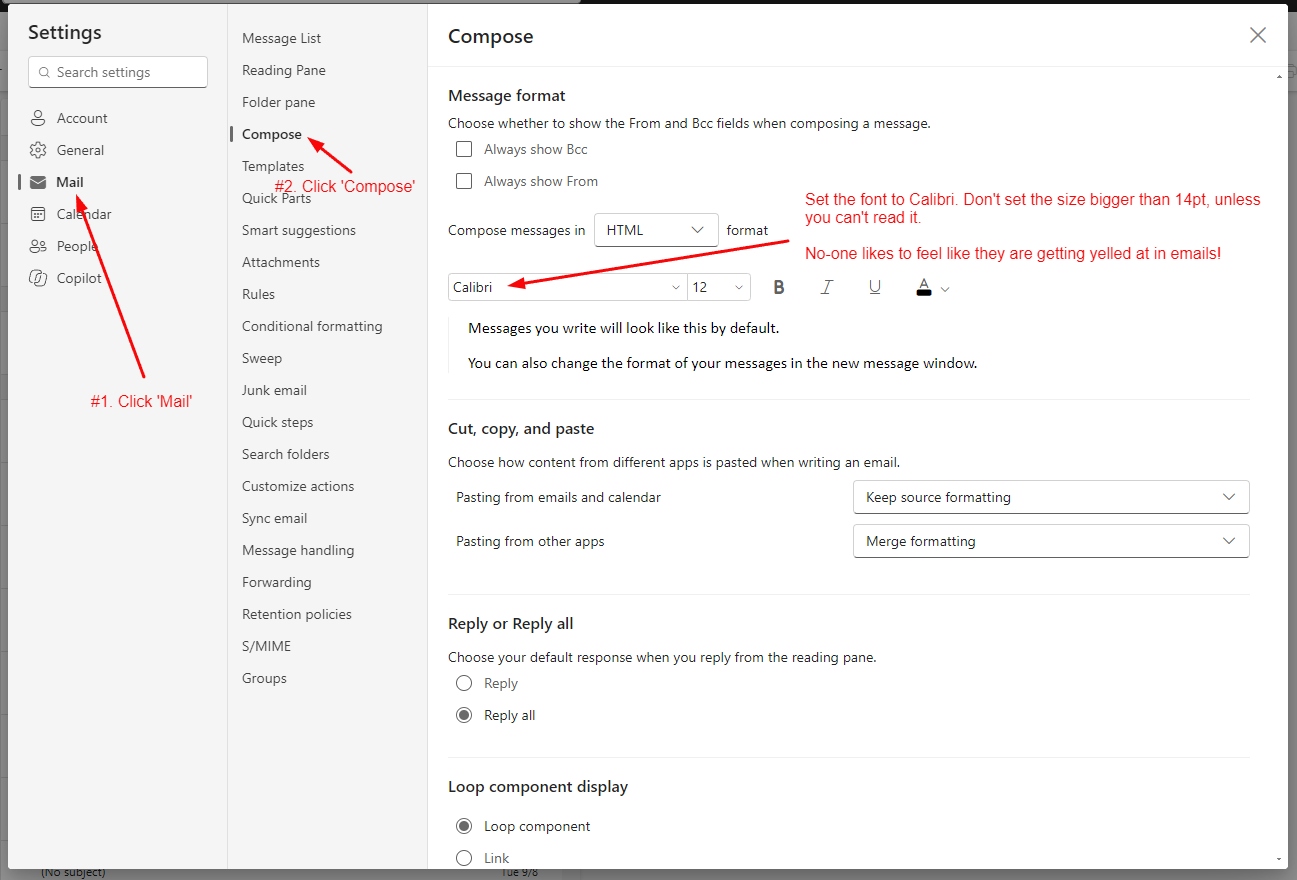
Verify that everything looks correct.
If you followed all of these steps, your email content and signature will be neat and tidy like the following example. After you verified it, send an email with the subject “Check my Signature!” to Marketing@TaosHospital.org so that we can verify that everything looks correct and we’ll give you a digital high five for your great work!
If you have any issues or questions email marketing@taoshospital.org.